How to Speed up a Video on iMovie Smoothly
by Kayla Morrison • 2026-01-21 18:55:16 • Proven solutions
Mac and iOS users can easily make movies using the iMovie app. With it, you can create that 'magic' movie with some special effects such as freeze frame or PIP (Picture-In-Picture). It doesn't stop there, though, because iMovie allows users to speed up their movies. Whether you want to speed up a specific section or the whole film, iMovie has it all. But do you know how to speed up a video on iMovie? Well, that's precisely what this post will be discussing.
- Part 1. Tips and Tricks: How to Speed Up Videos in iMovie
- Part 2. Top 4 Ways to Speed up Video Online for Free
- Part 3. Extra Knowledge about iMovie Input File
Part 1. Tips and Tricks: How to Speed Up Videos in iMovie
In this part, I'm going to introduce you to the "Fast Forward" feature of iMovie. This means that we'll be learning how to speed up the video on the iMovie app. Let's get started!
Step 1: Launch iMovie and then create a new project. Now import and drag your video to the timeline.
Step 2: From there, choose a clip you intend to speed up and then click the Speed icon to launch the speed controls.
Step 3: Click the Speed drop-down list and choose the Fast and then set your video speed at 2x, 4x, 8x, or 20x. You'll see a rabbit icon on your clip as well as a speed slider at the top. You can play with the slider to adjust your video speed manually.
Note: Speeding up your clip will raise the pitch if it has audio.
Step 4: When satisfied with the video speed, click the Share, and then choose the File to save it locally. You can also upload it to Vimeo, YouTube, iTunes, etc.

Part 2. Top 4 Ways to Speed up Video Online for Free
If you find using iMovie too technical, you can try using some free websites. Apart from being free, these sites are also simple to use and will deliver amazing results.
1. Clideo
When it comes to websites with the best video editing functions, nothing can compare to what Clideo offers. It boasts of a clean user interface that's free on any adverts. With Clideo, you can edit movies by cropping, rotating, cutting, merging, reversing, resizing, and many more. But its ability to speed up your video clips that sets it apart from the rest. Simply click Choose File to import your video, after which you'll get up to six commonly-used video speeds. They include 0.25x, 0.5x, 0.75x, 1.25x, 1.5x, and 2x. You can also set the target format as VOB, M2TS, 3G2, WMV, and many other formats. Clideo is one of a kind.
Pros:
- Easy to use.
- Accepts several formats.
Cons:
- Limited upload size (500MB).
- Can't speed up videos offline.

2. Wofox
Wofox is another video editing site with a great design and plenty of tools. Here, you can make slideshows, add subtitles, rotate videos, extract audios, merge videos, and many more. That said, Wofox can either slow down or speed up your videos without needing any additional plugins. You only need to click Upload to import your videos and accelerate them accordingly. You can speed up your video 0.5x, 0.75x, 1x, 1.5x, or 2x. Just remember that you will have to deal with some few ads on the free version of Wofox. But all-in-all, it is an excellent video accelerator.
Pros:
- Fast upload and conversion.
- Plenty of editing tools.
Cons:
- Has several ads.
- The free tier offers limited editing tools.

3. Kapwing
Kapwing is an open-source video editing site that offers several file editing tools. Here, you can create slideshows, trim videos, loop videos, generate memes, and many more. You'll also get free templates for your stories or meme. Back to speeding up videos, Kapwing will do that with speeds up to 4x faster than the initial rate. It will even show you the speed of your final output. However, the free version can edit and save your content for up to 7 days only. You'll also get a mere 500MB upload limit.
Pros:
- Several video editing tools.
- Clean user interface.
Cons:
- Limited file upload size.
- The free version offers limited services.

4. Ezgif
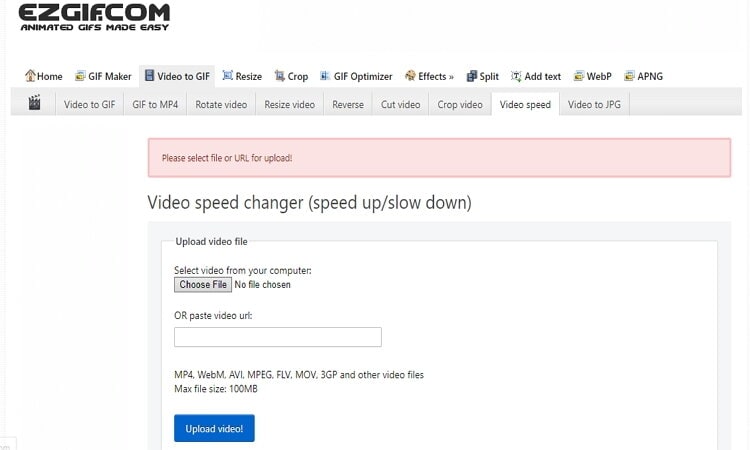
Last here is Ezgif, which, in my opinion, provides the most extensive list of video editing tools. It can crop videos, add text, optimize GIF, crop, resize, and even convert between popular formats. In addition to that, Ezgif can speed up videos, mute/remove sound, and many more. But just like the other options on this list, it has some drawbacks. For example, Ezgif offers a mere 100MB as the maximum file upload size on its free version. Another thing, the user interface has some ads.
Pros:
- Simple to learn and use.
- Offers an extensive collection of tools.
Cons:
- Small upload size.
- Has ads all over.

Part 3. Extra Knowledge about iMovie Input File
Although iMovie is an excellent app for editing videos, there are a few concerns. For example, iMovie files are typically exported in MOV format, which isn't supported by some media players. MOV is specifically designed to work on QuickTime Media Player. So if you're a Windows or Android user, you might have to convert it to other universal formats like MP4. To be safe, install a professional video converter like Wondershare UniConverter.
With this app, you can convert iMovie to any standard video format without quality loss. Here, users can transform iMovie to AVI, MP4, VOB, 3GP, FLV, etc. You can also edit videos by cropping, trimming, rotating, etc. Moreover, it can burn videos to Blu-ray or DVD and even transfer them to Android, iPhone, digital cameras, and many more. It's worth noting, however, that the Wondershare UniConverter doesn't offer the "fast forward" feature. So, if you want an easy method of how to speed up a clip in iMovie, you can refer to Part 1 of this post.
Wondershare UniConverter - Best Video Converter
- Built-in editor for cutting, trimming, adding subtitles, and many other file editing tasks.
- Convert movies files to optimized preset for almost all devices.
- Download videos from popular sites like YouTube, Dailymotion, Vevo, etc.
- 90X faster conversion speed than any conventional converters.
- Edit, enhance & personalize your videos file.
- Download/record videos from YouTube and other 10,000 video sharing sites.
- Versatile toolbox combines video metadata, GIF maker, video compressor, and screen recorder.
- Supported OS: Windows 10/8/7, macOS 11 Big Sur, 10.15, 10.14, 10.13, 10.12, 10.11, 10.10, 10.9, 10.8, 10.7, 10.6.
Now let me take you through the short process of how to convert iMovie to MP4 or any other format.
Step 1 Import the iMovie file.
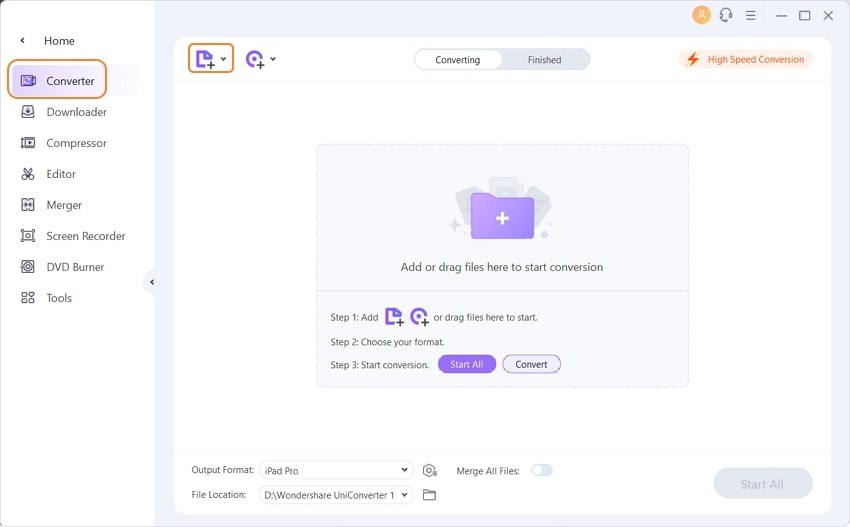
Visit the official site and download Wondershare UniConverter for Mac or Windows. Next, install and run it and then click the +Add Files icon to import your iMovie clip. It will appear as a video thumbnail.

Step 2 Choose a target format.
Now click the Setting icon > Video > MP4 > Resolution. It would help if you chose MP4 because it's a universal format.

Note: You can edit the iMovie clip by hitting one of the three edit icons below it. From there, you can change effect, apply subtitle, remove audio, add a watermark, and many more.
Step 3 Convert iMovie to MP4.
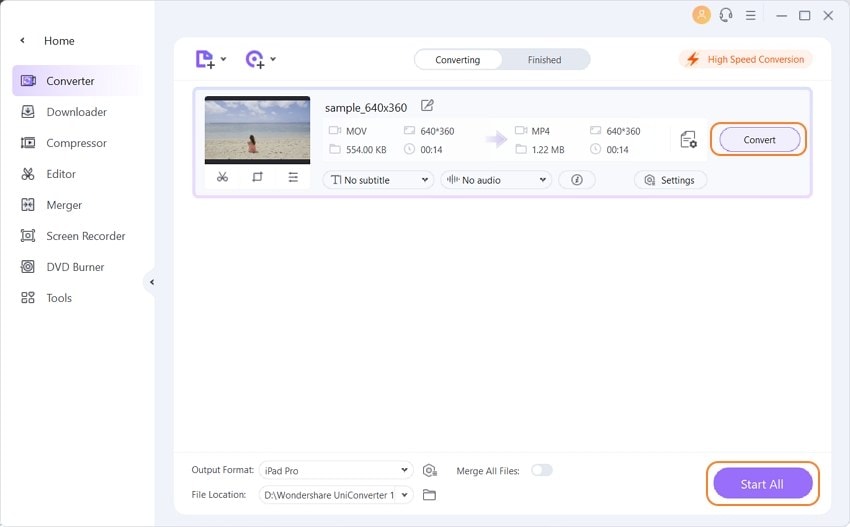
Lastly, set a saving/destination folder and then hit the Convert for the app to begin transforming iMovie to MP4 format. That's it!


Kayla Morrison
staff Editor